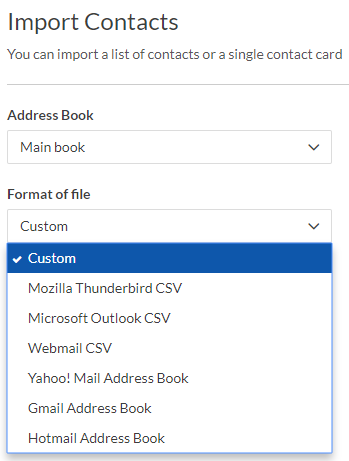
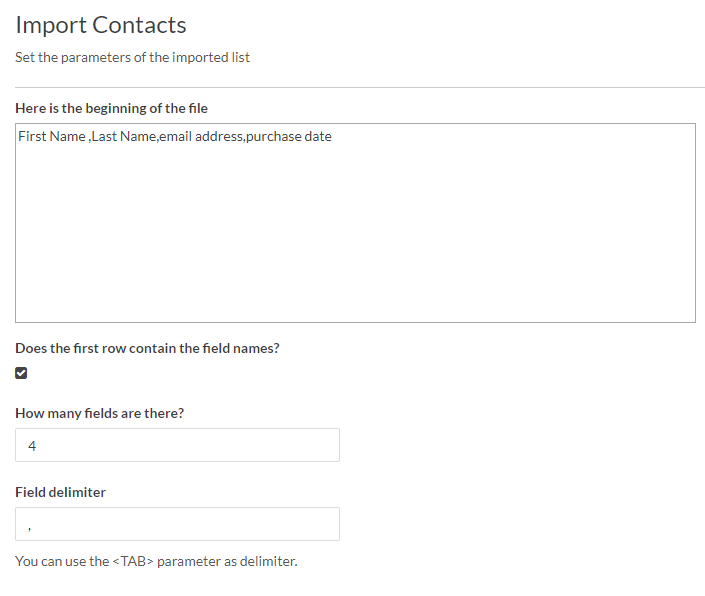
Verify the information and select Next.Note: Fields are the columns in your CSV file such as first name, last name, email, etc.
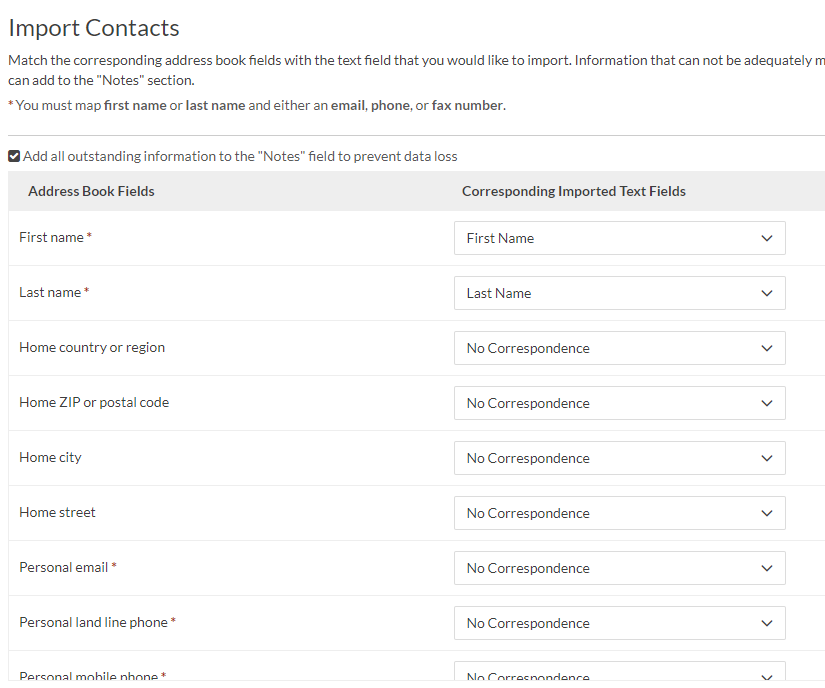
Next, you will map each field in your CSV file to the appropriate address book field. Make sure to accurately select the fields that match those in your CSV file.
Finally, select Import. You will find your imported contacts in the address book you selected.